As there seems to exist some interest in my image processing workflow for the recent IC 1848 image, here we go …
Bicolor processing!
Integration
Darks, darkflats (or flat darks ;-), flats, lights only, no bias! Standard workflow for lights: ImageCalibration with master dark/master flat; CosmeticCorrection with master dark/auto hot pixels; Debayer; SubframeSelector (weights); StarAlign; ImageIntegration with Sigma Clipping/weights
Linear
DynamicCrop to remove stacking edges.
ChannelExtraction R/G/B.
Cloned R image as Ha image.
Combined G/B images with PixelMath “0.75*G + 0.25*B” as O3 image.
The following steps are applied to both the Ha and the O3 image:
DynamicBackgroundExtraction with just 4 samples in the 4 corners of the image to remove background color gradient.
Extract L channel from image (or just clone it).
Apply HistogramTransformation with parameters from standard ScreenTransferFunction autostretch.
Use HistogramTransformation to further stretch the L image, so that the leftmost hump of the histogram peaks at 75%. This will be use as an L mask.
Apply MultiscaleMedianTransform with the inverted L mask for linear noise reduction, twice.
Clone the image.
Use PixelMath “mtf(0.01164,$T)” / “mtf(0.00384,$T)” to stretch the image for StarNet. Values for Ha/O3 derived from STF autostretch.
Run StarNet process with standard settings to remove stars.
Use PixelMath “mtf(1-X,$T)” to transform the image back to linear. X is the same value as above.
Ha image only:
Make a second clone of the original Ha image (after MMT).
Apply the same steps as above for linear StarNet, but set the StarNet parameters to star mask. This is the Ha stars image.
Non-linear
The following steps are applied to both the Ha and the O3 image:
Use a stark ;-) stretch with HistogramTransformation (if necessary 2 steps) to get a bright Ha/O3 nebula, I want the background sky at ~0.12 and the right hump of the histogram around the 50% level.
Ha image only:
Use a mild ;-) stretch on the Ha stars image with HistogramTransformation to get a nice star field, also pull in the white level to ~25%, the brightest stars were in the 0.5 ball park figure for IC 1848.
Use PixelMath to combine the Ha starless and the Ha stars image “Ha_starless + Ha_stars”.
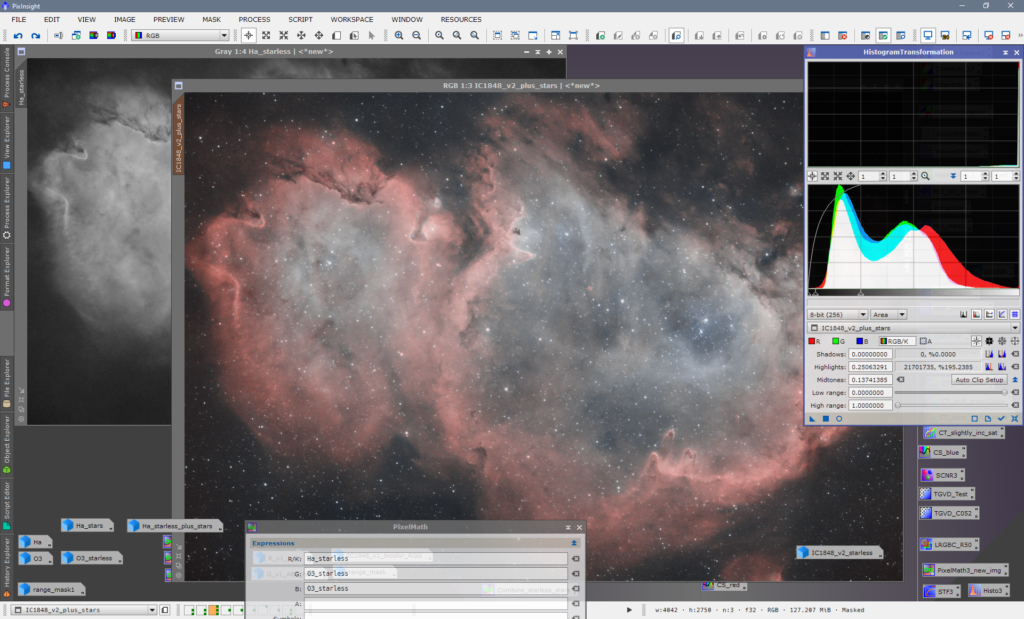
Bicolor processing
Use PixelMath to combine the Ha and O3 starless images “R/K: Ha_starless; G=O3_starless; B=O3_starless”.
(Alternatives for G channel: “0.5*Ha + 0.5*O3” or “Ha*O3*1.5 + 0.1”)
Run SCNR to remove greenish stuff.
Use LRGBCombination to pull in the Ha starless + stars image as L, boost saturation with 0.37. The main advantage is that the Ha image has tighter stars and less noise.
Use RangeSelection to create a range mask for the nebula.
With range mask applied, boost red saturation with ColorSaturation.
With range mask applied, run LocalHistogramEqualization with radius=128, slopeLimit=1.5, amount=0.33.
With range mask applied, use CurvesTransformation (S) to boost overall saturation.
Save as 16 bit TIFF image.
Photoshop post processing
Add a Selective Color layer to boost red (cyan -35, magenta +10) and blue (cyan +30, yellow -20).
Add a Curves layer in Color mode to remove sky background color below 34.
Run the Astronomy Tools Deep Space Noise Reduction action.
Lightroom post processing
Final tweaks in Lightroom: adjust black level, boost clarity +20, vibrance +25; sharpening and a final touch of noise reduction.