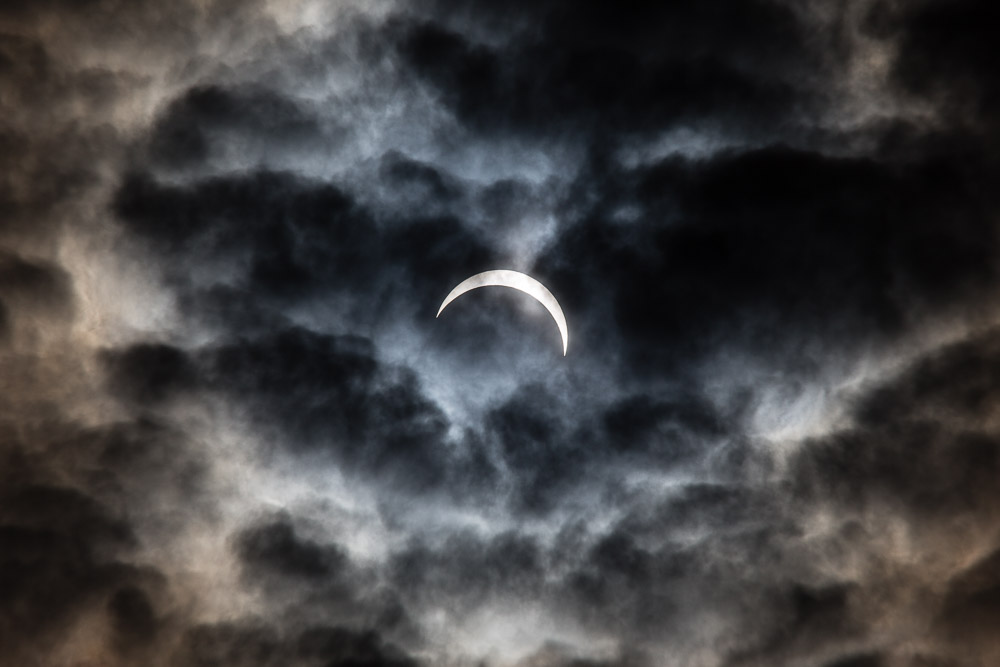
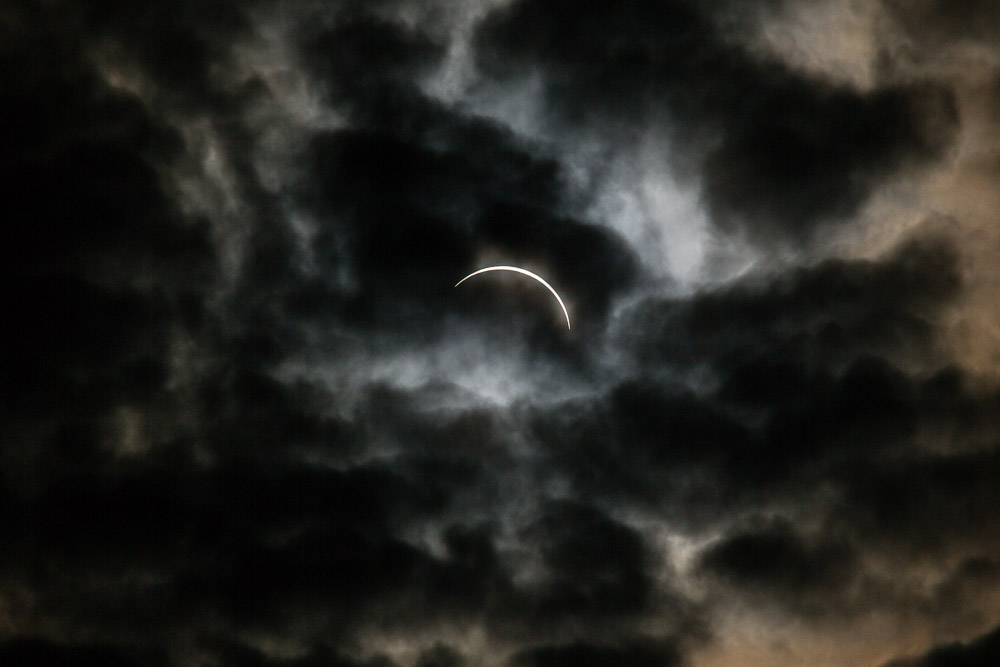
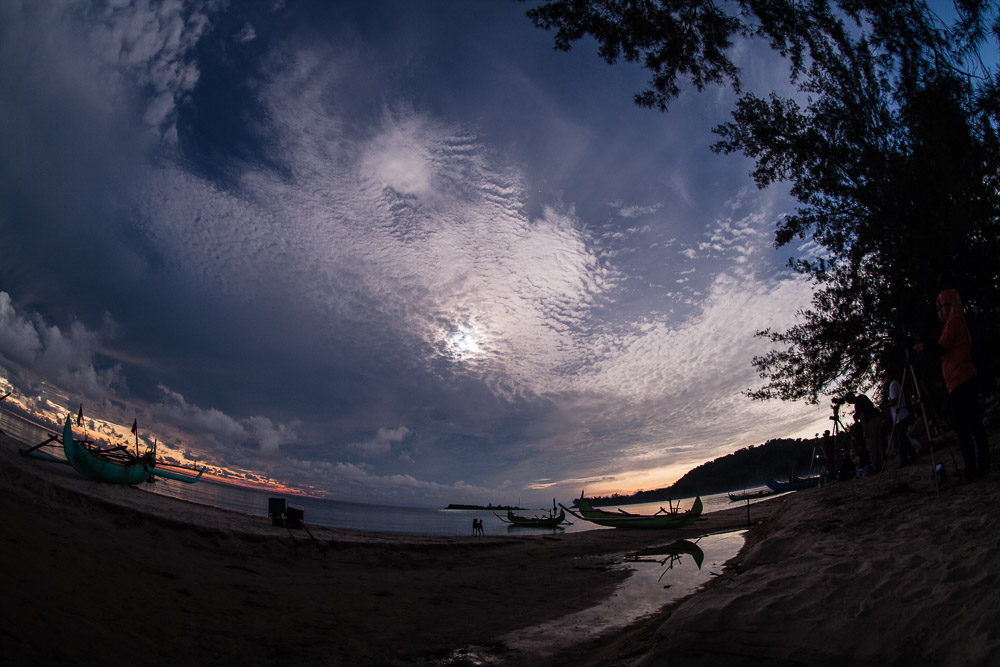
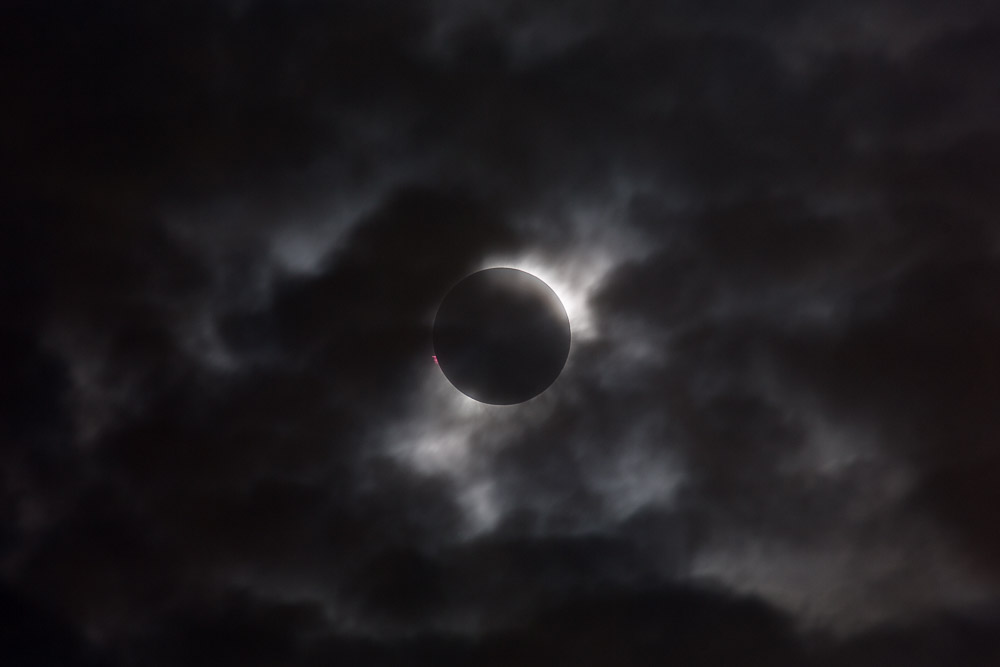
The total solar eclipse of 09 Mar 2016 on Belitung, Indonesia under difficult conditions, as close as it gets to clouded out.
The total solar eclipse of 09 Mar 2016 on Belitung, Indonesia under difficult conditions, as close as it gets to clouded out.
Wegen der sehr stark gestiegenen Zahl der Spam-Anmeldungen musste ich leider die Möglichkeit zur Registrierung als neuer User abgeschalten. Bei Bedarf bitte unter Kontakt melden.
Sorry, due to the high volume of spam registrations I had to disable that everyone could register as a new user. Feel free to contact me here for user registration or anything else.

C19 to Sesriem
A large selection of the Namibia 2015 image will be posted to the respective album at Google Photos. Some are already up, more to come.
Ein größere Auswahl der Namibia 2015 Bilder wird in dem entsprechenden Album bei Google Fotos gepostet. Einige sind schon vorhanden, mehr in den nächsten Tagen.
Die Deep Sky 2015 Bilder gibt es jetzt auch als Video auf Vimeo, Youtube und Facebook.
The Deep Sky 2015 Images are now also available as a video on Vimeo, Youtube and Facebook.
Noch mal Guten Rutsch! Happy New Year!
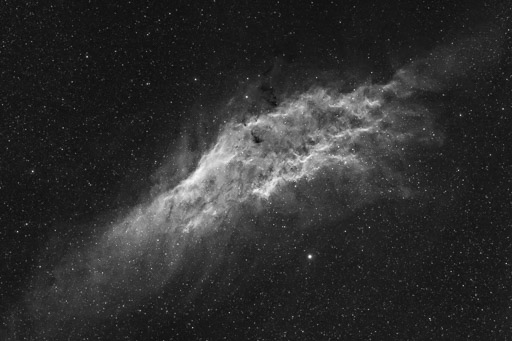
NGC 1499 – California Nebula
Die einigermaßen gelungenen (Deep Sky) Astrofotos aus diesem Jahr finden sich in dem Google Fotos Album “Deep Sky 2015”. Aufnahmeorte: Köln-Dellbrück; Dr.-Heinrich-Menke-Park, Eifel; Internationale Amateursternwarte, Hakos, Namibia.
Somewhat decent (deep sky) astrophotography over the course of this year can be found in the Google Photos album “Deep Sky 2015”. Locations: Dellbrück, Cologne, Germany; Dr.-Heinrich-Menke-Park, Eifel, Germany; IAS Observatory, Hakos, Namibia.

Photo: Jennifer Büter, Australien 2014
Frohe Weihnachten und auch schon mal einen Guten Rutsch wünsche ich euch allen.
Merry Christmas and a Happy New Year to all of you.
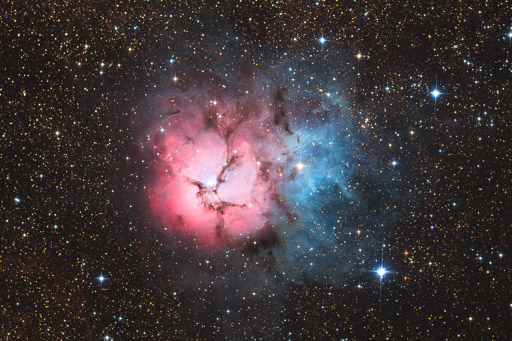
Trifid Nebula – M20 or NGC 6514, 32 x 300s
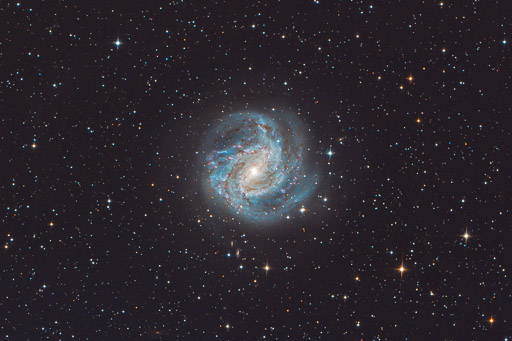
Southern Pinwheel Galaxy – M83 or NGC 5236, 30 x 300s
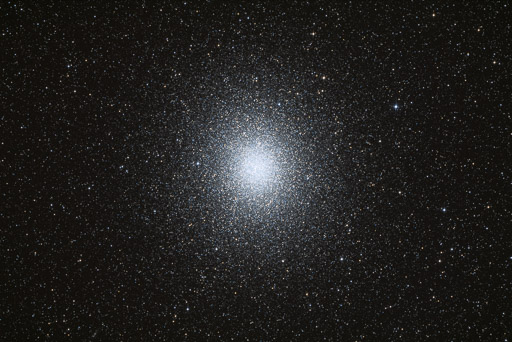
Omega Centauri – NGC 5139, 24 x 90s
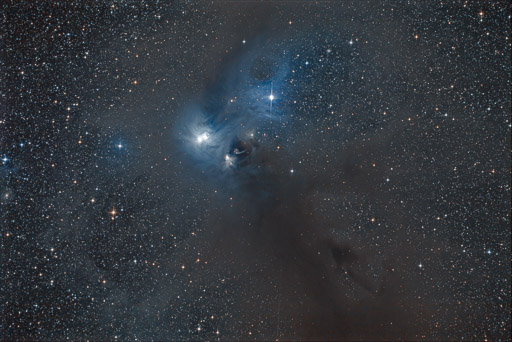
NGC 6726, 6727, 6729, IC 4812 in Corona Australis
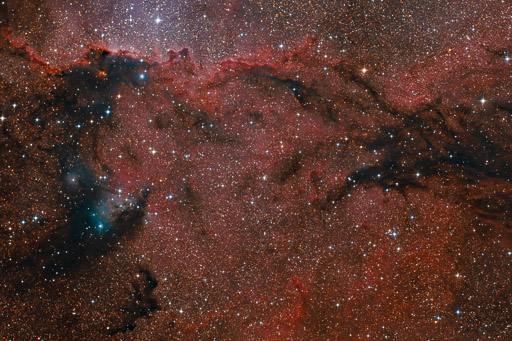
NGC 6188, 24 x 300s
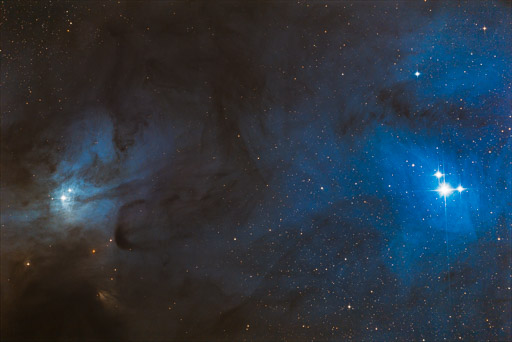
IC 4603 and Rho Ophiuchi, 16 x 300s
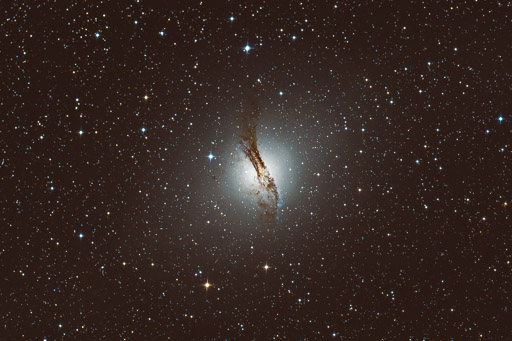
Centaurus A – NGC 5128, 25 x 300s
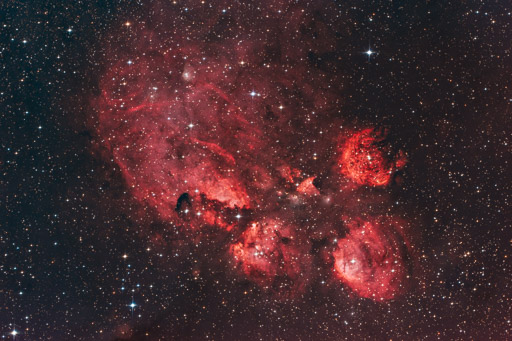
Cat’s Paw Nebula – NGC 6334, 16 x 300s
IAS Observatory, Hakos, Namibia
20″ Philipp Keller Cassegrain primary focus @ 1500mm f/3
Liebscher Mount with FS2
Off axis guiding with Lodestar X2, dithering with BackyardEOS and PHD2
Canon 5D Mark II (a) or 5D Mark III (unmod), varying crop
Varying # of subs and exposure, see above, ISO 800 + sky flats/bias, no darks
Image processing DeepSkyStacker, Lightroom, Photoshop
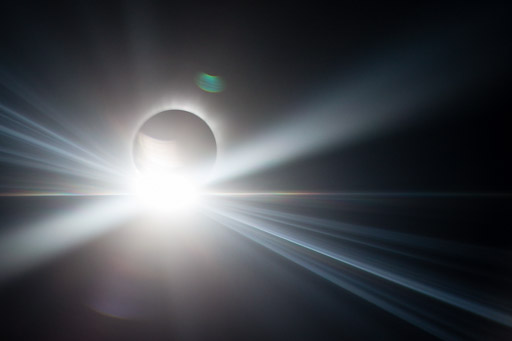
Total Solar Eclipse 20 Mar 2015 #5 – 3rd Contact
More than two years after our last one, we took the plunge and off into the darkness. Literally.
What I’m writing about is the total solar eclipse of 20 March 2015 over the Northern Atlantic Ocean, of course. A place and time where weather prospect weren’t exactly stellar or solar, thus quite early, already in 2013, we booked Eclipse Reisen’s e-flight (operated by Air Berlin, AB 1000) from Düsseldorf.
Into the car, onto the plane, into the darkness, back into the light and the Düsseldorfian fog, and home-bound again. 12 hours round-trip, certainly a very “efficient” eclipse trip. ;-)
The experience in the air was quite different from our previous ground-based eclipse excursions. A lot of the anxiety and anticipation – will we really see totality? – is missing, as success is almost guaranteed. And when the plane finally navigates into the “eclipse run”, the partial phase is mostly completed, we didn’t get to see C1 or C4.
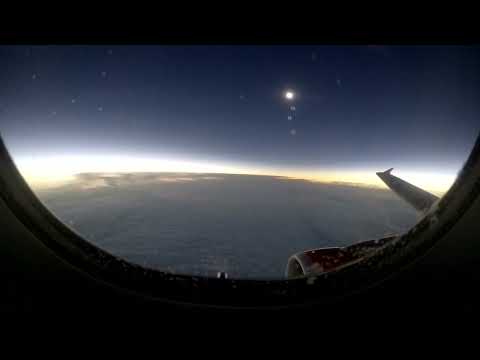
But absolutely priceless is the view of the moon’s umbra moving across the clouds below, seemingly slowly catching up with the air plane, then plunging us into darkness, and finally off it goes, moving away from of us. Thus I’m very happy that I was able to catch this on video.
35,000 ft above the Northern Atlantic / Norwegian Sea with mid totality at 63°31’21.3″N 7°53’05.6″W / UTC 09:43:30. From the telephoto shots I did, the contact times and positions were as follows:
for a totality duration of 3min 40s.
Impressive, as it always has been and will be. Where’s the next one? …
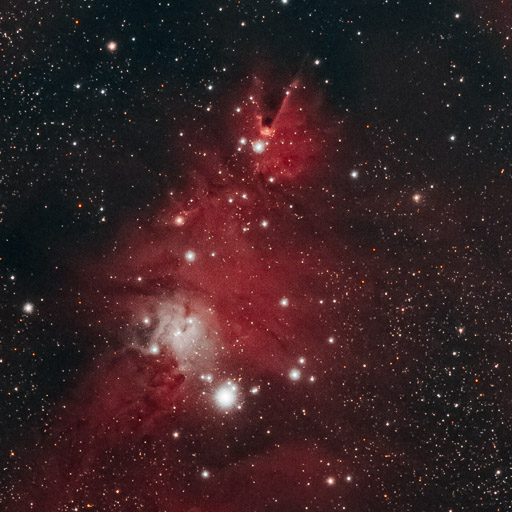
NGC 2264 – Christmas Tree Cluster and Cone Nebula
… Cluster. ;-)
Just the right image for this time of the year. Merry Christmas and a Happy New Year to all of you!
Genau das passende Bild für diese Jahreszeit. Frohe Weihnachten und Guten Rutsch in’s Neue Jahr wünsche ich euch allen!
London 2013 – Ups and Downs from Martin Junius on Vimeo.
Short time-lapse video from London in October 2013.
Video created using AVISynth, VirtualDub, Handbrake. Music created using Beatmaker 2, Nave, Sunrizer on iPad.
And while we are at it, given this time of the year: Merry Christmas and a Happy New Year!